CURVES TECHNIQUE TUTORIAL: Making Templates and Piecing Quarter Circles, Half Circles and Inset Circles
Incorporating curves in my work has been as challenging as it has been satisfying. There’s something about the shape of a half circle in a quilt that’s unexpected, gentle and pleasing — elements that you can’t get from other shapes. I consider it an intermediate-level sewing skill, but I encourage you to try it out and take some time to practice. There’s a bit of a learning curve (no pun intended) when it comes to piecing curves, but one you get the hang of the technique, you’ll be hooked!
In the following tutorial, I’ll be walking you through everything you’ll need to know about piecing curves, including making your own templates, how to use those templates, how to piece quarter circles, half circles and inset circles, as well as tips and tricks every step of the way.
Let’s start with making templates. To create the curved shapes you’ll piece together, you’ll need templates in a variety of sizes. You can buy pre-made acrylic templates, but making your own is simple, inexpensive, and doesn’t require any special tools. Once you learn this method, you’ll be able to make curves in any size you’d like!
MAKING CURVE TEMPLATES
Tools:
Sheet of thick paper or cardboard that’s at least the same length as your curve’s diameter (I like to use either butcher paper or a cardboard shipping box)
Ruler
Pen or pencil
Scissors
STEP 1 - MARK THE DIAMETER
Place your paper or cardboard flat on your workspace and using your ruler along the straight edge of the paper, mark the length of the diameter. So if you’re making a 12.5” template, make a mark at 0” and 12.5”.
STEP 2 - MARK THE RADIUS
Then you want to find the radius, or the halfway point, by dividing the diameter by two. 12.5” divided by two is 6.25”, so you’ll make a mark along the straight edge of the paper at 6.25” halfway between the 0” and 12.5”. Then, from that mark, draw a 6.25” long radius line straight up from that mark, perpendicular to the straight edge.
STEP 3 - DRAW THE CURVE
Keeping your ruler centered at the halfway point, move the end of the ruler around the half circle like a clock and draw multiple radius lines that radiate out from the center. Once you can see the half circle shape forming, use your pencil to connect the ends of each radius line, making a smooth curved line from the 0” mark up to the 6.25” and down to the 12.5” mark. It doesn’t have to be perfect, but making sure it’s a fairly smooth and even curve will make for easier piecing.
STEP 4 - CUT OUT THE TEMPLATE
Once you’re happy with your drawn half circle, cut out the template with your scissors. Make sure to label your template with the diameter so you don’t get them mixed up!
For the designs in the book, you’ll need the following template sizes:
Template A - 18.5”
Template B - 17.5”
Template C - 9.5”
Template D - 8.5”
Template E - 12.5”
Template F - 11.5”
Template G - 24.5”
Template H - 23.5”
Template I - 8.5”
Template J - 7.5”
NOTE: When you piece curves, you have two pieces of fabric that require two different sized templates: one will become the actual half circle (or quarter circle or inset circle) and the other will be the background (with a half circle cut out of it). In order to account for the .25” seam allowance, the diameter of the half circle template must measure 1” larger than the background template’s diameter. If you need the finished size of your half circle to be a specific dimension, say 12”, you’ll need a 12.5” half circle template and an 11.5” background template.
QUARTER CIRCLES AND HALF CIRCLES
Both quarter circles and half circles use the same technique, but quarter circles tend to be a little easier if you’re just starting out. Since they’re pieced the same way, I’ll show you how to construct a half circle since it’s used more frequently in the book. Keep in mind that everything is the same for quarter circles, but you’re just using one half of the template to cut out your quarter circles.
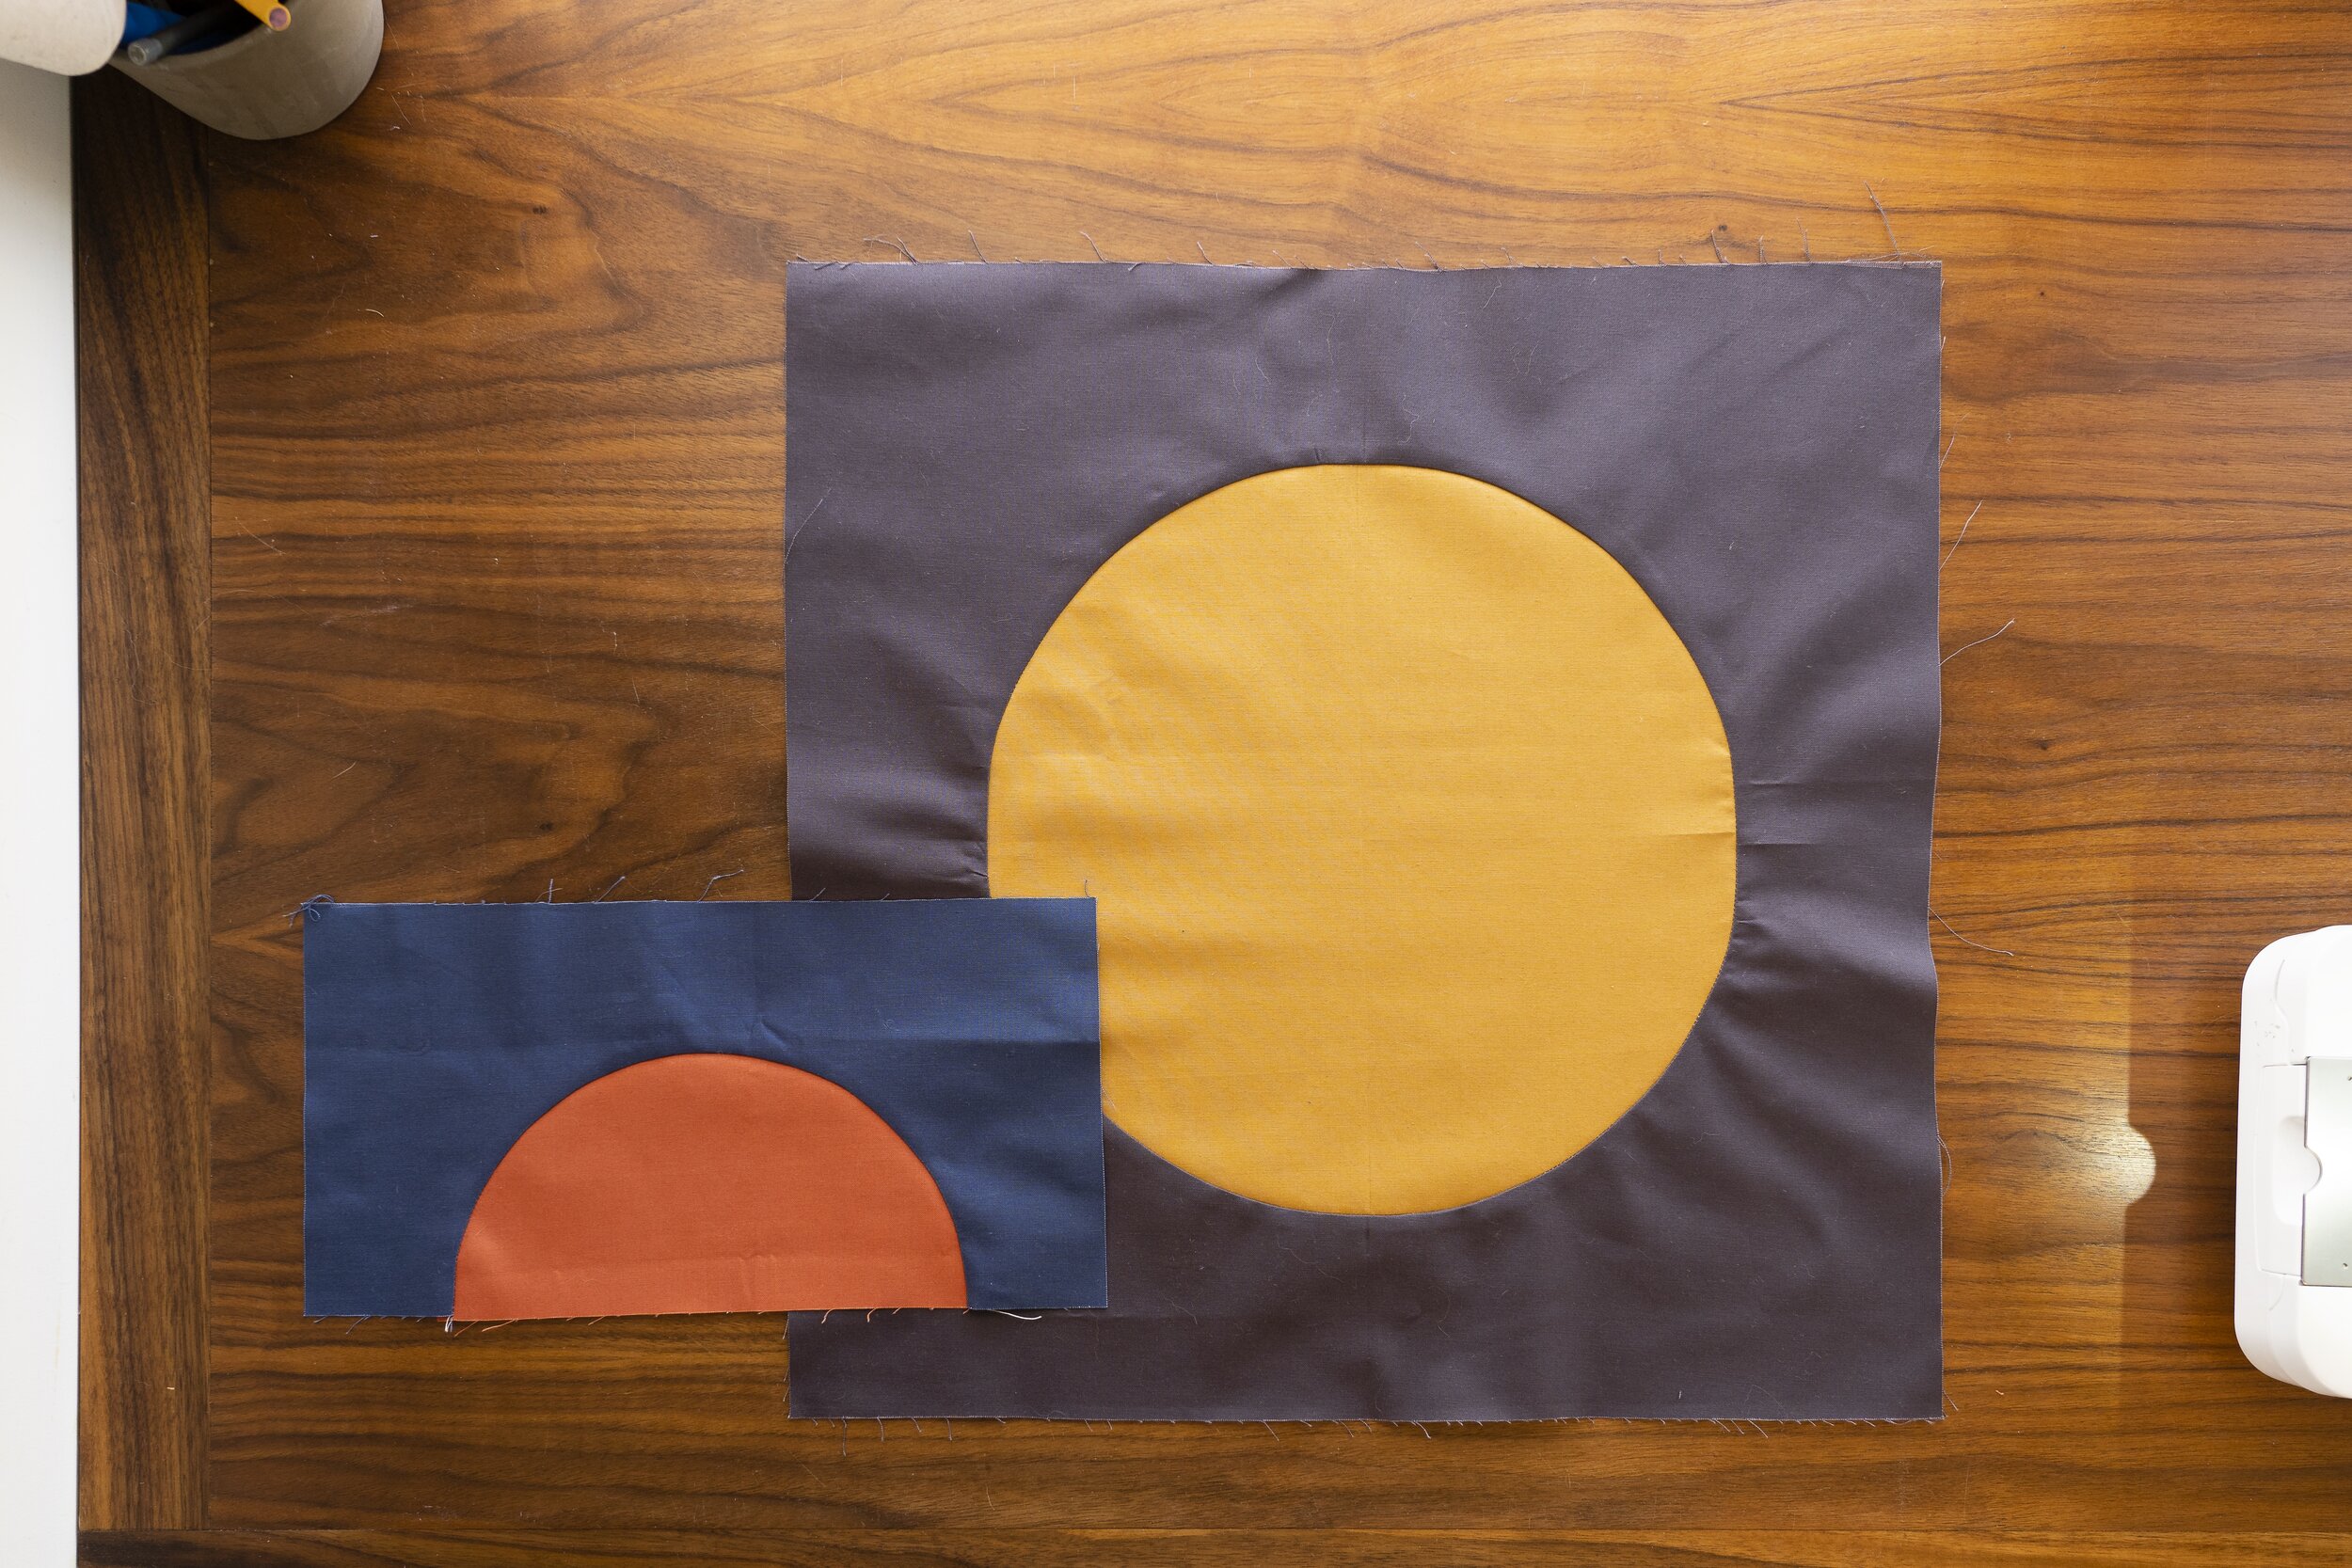
Let’s make an 8” Terracotta half circle on a Blue background for an example. The larger of the two templates will always be used for the half circle itself. The smaller template will be used to cut the concave half circle out of the rectangle you’re inserting the half circle into. You’ll need the following fabric and templates:
Template I - 8.5”
Template J - 7.5”
Blue Rectangle - 6.5” x 12.5”
Terracotta Rectangle - 4.5” x 8.5”
Place Template I on top of your Terracotta rectangle, lining up the straight edge of the template with the bottom edge of the fabric, and carefully cut around the template. Keep the half circle you cut out and discard the surrounding rectangle. Do the same with Template J and your Blue rectangle, being more careful to center the template. Discard the half circle and keep the surrounding rectangle.
Cut around the template.
To piece your half circle into the background, place both pieces in front of you on your workspace. Orient both so the flat edge (the side you cut from) is facing away from you. Then align the right edge of the Terracotta half circle with the left edge of the Blue concave curve.
Place each piece for piecing.
Start slowly sewing along the edge of the curve with a ¼” seam allowance, adjusting every ½” or so to keep both pieces together so the curved edges meet as you move around the curve. Note that the Terracotta half circle won’t be flat - as long as the fabric underneath your presser foot is flat and pucker-free, you’re doing it right! Don’t be afraid to stop and readjust multiple times. When you reach the end of the half circle, you may need to stop and lift the presser foot to bring the two ends together.
TIP: You’ll want to keep both the top and bottom fabrics at a slight tension while you’re sewing around the curve to keep both flat. Don’t pull too much or you’ll warp the half circle. Depending on the fabric you choose, it may be worth it to test out one or two half circles before starting your project.
Move the edges of the curves together when sewing.
Once you’ve sewn all the way around the half circle, press you seam towards the darker of the two fabrics. So in this case, you’ll press the seam outwards towards the Blue fabric. If the bottom edges don’t line up perfectly, just trim the bottom.
Patience makes perfect when it comes to sewing half circles.
INSET CIRCLES
An inset circle is a circular piece of fabric sewn into a hole in another piece of fabric. It’s a bit trickier and less forgiving than half circles since there’s a better chance of puckering, but the effect is impressive. I’ll show you how to make a 12” Curry inset circle on a Charcoal background.
You’ll need the following templates and fabric:
Template E - 12.5”
Template F - 11.5” ¾”
Curry square that measures 12.5” x 12.5”
Charcoal square that measures 18.5” x 18.5”
Place your Curry square on your cutting mat and fold it in half. Place Template E on top of the folded square, lining up the straight edge of the template with the folded edge of the fabric, and carefully cut around the template. Unfold your Curry square and you should have a perfect circle. Using the same method , cut a circle out of the center of your Charcoal square with Template F. Because this square is larger than your template, make sure the template is centered. Discard the circle you cut out and keep the surrounding square with a hole in the center.
Cut out the circle.
Next you’ll sew the Curry circle into your Charcoal square. Fold both pieces of fabric into quarters and make a crease at each fold. Lay out your Curry circle on your workspace, then place your Charcoal square on top of the circle, centering the hole over the circle and lining up the creases. Find your first crease on the Charcoal square and flip that edge over so that right sides are facing, lining up both curved edges and aligning the creases. Pin in place. Do the same with the remaining 3 creases.
Put the fabric together, right sides facing at each crease.
This will keep your circle from getting too wonky and your fabric evenly spaced. Then, with the Curry circle on the bottom, slowly sew along the edge with ¼” seam allowance, adjusting the fabric to bring the curved edges together as you go. You’ll sew all the way around your circle, adjusting how taut you’re pulling each piece of fabric in order to avoid any puckering.
Once you’re finished, press your seams outwards, towards the Charcoal square.
Carefully sew around the circle, adjusting the curved edges together while sewing.
Simple as that! But don’t forget: practice makes (almost) perfect. The more circles you piece, the smoother, easier and faster they get. I hope you enjoy piecing curves as much as a I do!


